The Tilted Nine-Patch

The nine-patch: such a classic block. Every quilter has done one of those quilts, or twenty, or a hundred… The point is, you’ve definitely done one, so why not kick it up a notch and add a little twist?
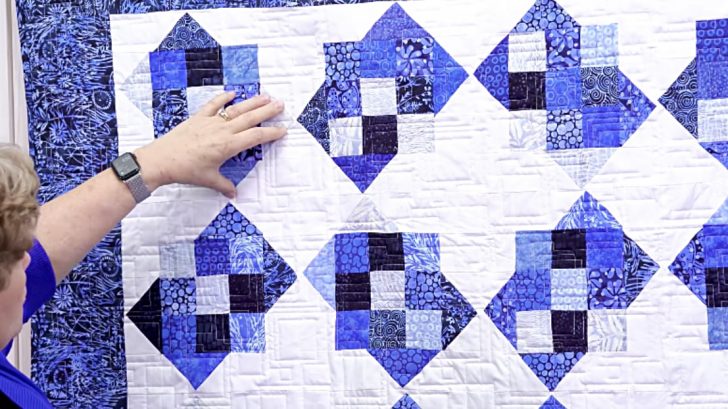
Jenny Doan from Missouri Star Quilt Company is back at it again with this incredible twist on the classic. It’s called the tilted nine-patch. Not only is it gorgeous, but it’s easy, too!
Here’s what you’ll need to get started:

Making The Tilt
Making this tilted nine-patch block is relatively simple. Begin by making a classic nine-patch, then from there, we can build upon it to make this unique tilted block!
Begin by making your nine-patch. To give the block a bit more dimension, make the nine-patch with as many fabrics as you can. Once you add the tilt, it gives it a more detailed, eye-catching look.
Now on to the tilt. You’ll be using 4 blocks of background fabric that are identical in size to the nine-patch squares, as well as 2 rectangles made from the equivalent of two of those squares.
There will also be 4 rectangles that same size, except those rectangles will be made out of 3 equilateral triangles. You can watch Jenny get into that more in the video below.
Now for the construction: Place the nine-patch in the middle. Now, add one of your triangle strips on top of your nine patch, over the left two square.
Repeat this process by placing one of those triangle strips over the top two squares of the left side, the right two squares of the bottom, and the bottom two squares of the right side.
Finally, you’ll add your squares and rectangles to fill the leftover gaps. A square will go in the top left and bottom right corners. The other two will go next to the far right top square, and the far left bottom square.
Add the rectangles to the top right and bottom left. Once you sew this all up, you’re done!
Watch Jenny make this quilt in the video below, and Happy Quilting!