
Are you ready for a DIY bound to impress anyone who sees it? After a little research, I’ve realized anyone can DIY some macrame, and this adorable beaded curtain is proof.
This DIY comes from Andrew and Dennis at HGTV Handmade, and they couldn’t have made their video tutorial any easier to follow along. You could have one of these done today!
The macrame curtain looks fabulous hung up in a kitchen window, draped outside on a patio, or even in a bedroom. The choice is yours, but it always looks good!
If you’re like me and instantly wanted to make your own as soon as you saw this, then let’s get started on learning this DIY.
Here’s what you’ll need:
- 20 pieces of 100″ length macrame cord, folded in half.
- beads of choice (you can paint them as well if you’d like to)
- scissors
- painter’s tape (to keep the cord from fraying as you go)
- tension rod or wooden dowel to hang it on (if you use the wooden dowel, keep in mind that you may need to create something to hang the macrame with)
- planting pot and plant (if you do the planter option)
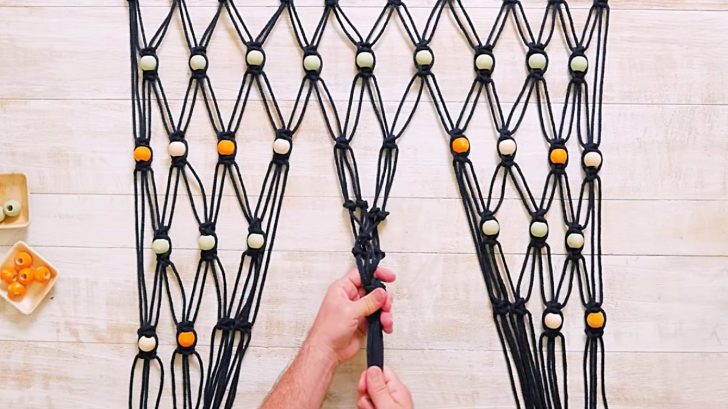
This is how it’s done. Begin by doing the lark’s head knot to attach the macrame cord to the dowel or tension rod. From here, you can begin your design.
The design that Andrew and Dennis do begins with a square knot. They do this over and over again, switching sides and adding beads as they go.
Keep in mind that you can do this by alternating what cords you use as well. It will give the macrame shape and hold the beads in place as well.
Now add the planter. Watch the video below to see how that’s done, and you’re ready to hang it up! Good luck and happy crafting!
