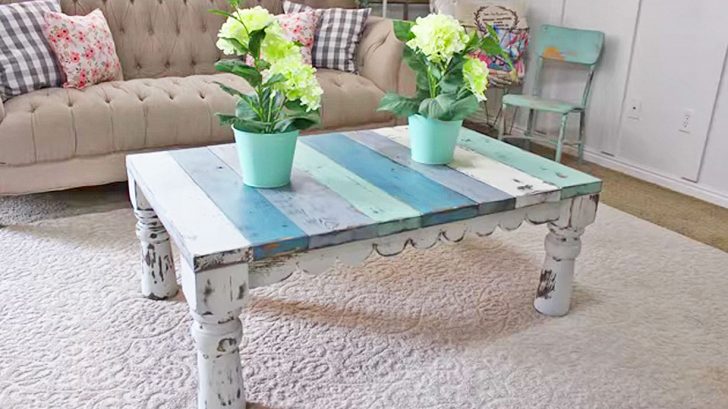
I love just about any DIY that has a rustic effect, and this is one of those projects. Making one of these farmhouse-inspired tables will make any room in your house have that rustic charm.
This large, sturdy table is sure to be a conversation starter and will get tons of compliments. You can change up the paint colors to fit any decor.
It looks like reclaimed wood, but all of the materials are new, meaning this distressed table will last you a super long time!
Jami Ray Vintage has a step-by-step tutorial on how to make this table. The 2.5′ x 4′ table is surprisingly easy to make. Here’s what you’ll need:
- A mix of 2×6″ and 2×8″ boards for the table top
- Wood stain & sealer
- Paint in multiple colors of your choice
- Extra wood for the legs (ends up being 17.5″ x 3 per leg)
- Extra wood for decoration and assembly
- Wood glue and clamps/something to use as clamps
- Lathe
- Sandpaper or hand sander
- Drill & screws
- Nuts & bolts / wrench
First, take your 2×6″ and 2×8″ boards and stain them, making sure ends are stained as well. Once sealed and dried, you can move on to painting them.
Paint the wood with a mixture of different paint colors, making sure ends are painted as well. When that’s dried, you can take your sandpaper/sander and distress the wood.
For the legs, use wood glue to glue pieces of wood together, clamping them. When dry, use your lathe to make your desired shape. Then stain and paint the legs like you did the top.
Jami Ray uses additional wood to give the table scalloped edges. If you decide to do this step, distress them as usual.
Use a drill, screws, nuts, bolts, a wrench, or whatever other tools you deem necessary to assemble the table together. You may need small pieces of wood to hold things in place.
Now the table is ready to use! Check out Jami Ray’s tutorial below for more details on how to make this adorable table, and show off your finished product once you’re done.
I promise you’ll be proud of your finished product!