The Continuous Curve

I love doing some free motion stitching on my quilts. They create the most beautiful finishing touch that really brings the whole thing together, and the end result is always stunning.
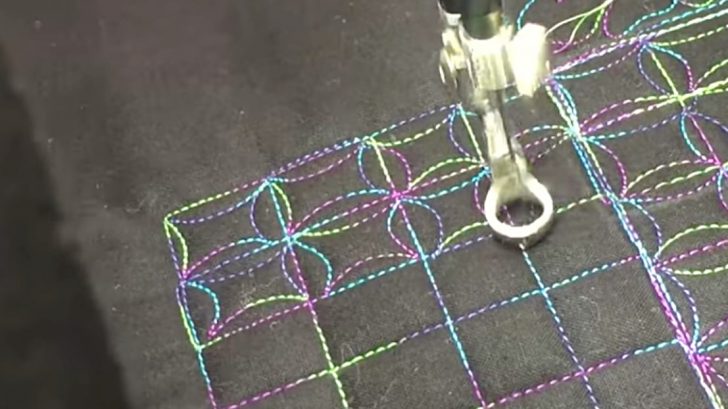
One of my favorite stitches is the continuous curve. It looks super complicated from afar, but learning the technique is easy, even for novice quilters.
All you need to do is create a grid, then stitch your curves over it. It sounds easier said than done, but trust me, it’s much simpler than it sounds.
The Grid
When it comes to stitching curves over a grid, it can get a little confusing, especially if you want those curves to be as even as the grid is.
The grid pattern can be achieved simply by using a ruler to create evenly spaced straight stitches. That’s the easy part. Now come the continuous curves, which are a lot easier than they appear.

One Simple Trick
Start from one corner, curving inward than upward to the opposite corner. You’ll repeat this all the way around until you have finished the 4th side. When that is finished, it’s time to move to the next.
To do that, you’ll want to move across a grid line from the final corner, then you’ll repeat the process to the 4 sides of the new square. How easy is that?

For a more in-depth visual, check out Handcrafters House‘s video below. She makes it so easy, I could practically do this with my eyes closed now!