In school, I hated geometry. I was no good at it, and I resented geometric shapes (and my geometry teacher) for a long time. That is until geometric shapes became a trend and I didn’t have to calculate angles anymore.
Now that math isn’t involved, I love anything geometric. Geometric shapes actually look pretty cool with most kinds of decor, and these geometric candles are no different.
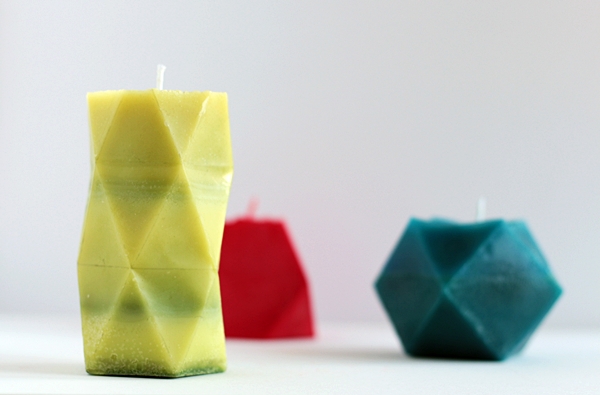
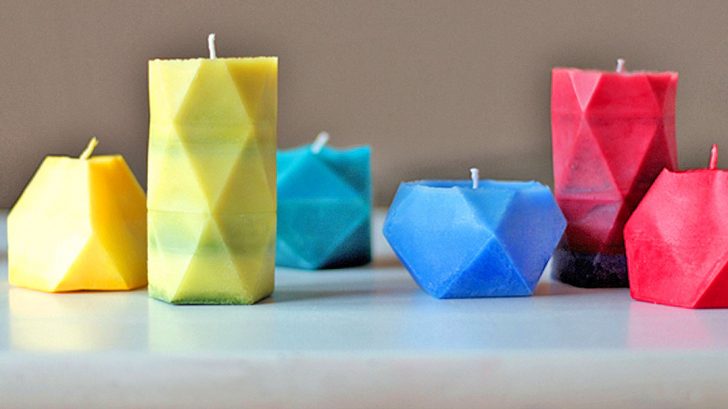
I love these geometric candles. They’re colorful, smell amazing, and add a really cool decoration to whatever space I put them in!
They look super hard to make, but with some pre-made templates by Eleanna Kotsikou, and her instructions down below, it’s really not all that hard.
Here’s how to make the coolest candles you’ll ever have in just a few simple steps.
Supplies

- Card stock, printer paper or photo paper (8.5in x 11in), 240gsm
- Templates
- Printer
- Scissors
- Ruler
- Craft glue
- House paint
- Paintbrush
- Candle wicks, 18cm and 13cm (7in and 5in) long
- Wooden skewers
- Leftover color crayons
- Pot
- Wire
- Empty jam jar
- Thermometer (optional)
- Paraffin flakes
- Scented oils or spices (optional)
- Stove
- Truncated tetrahedron template
- Cuboctaedron template
- Pentagonal antiprisms tube template
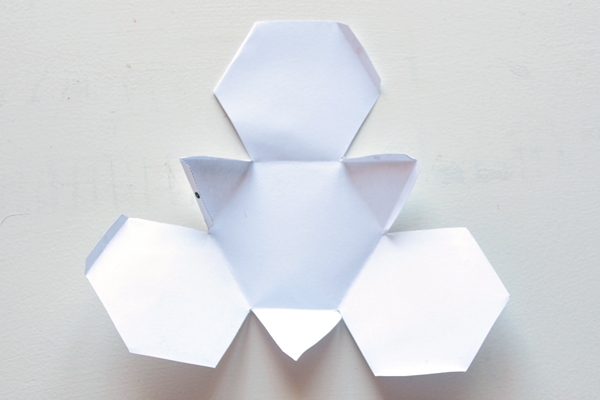
How To Make the Truncated Tetrahedron
Step 1
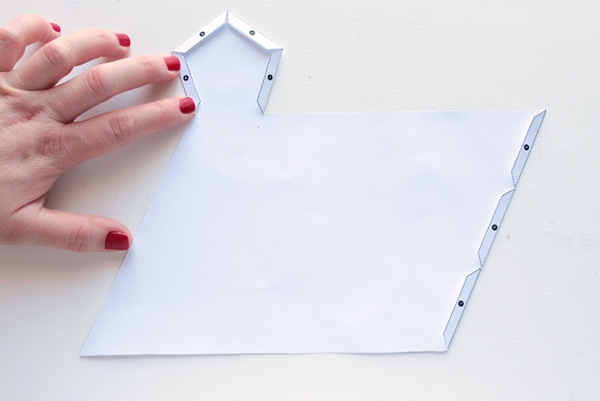
Download the template. Print it on card stock paper in A4 size (8.5in x 11in). You can also use heavyweight printer paper or photo paper (200-240gsm).
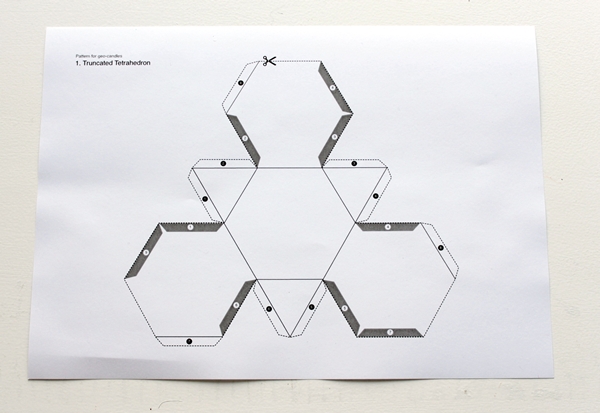
Step 2
Cut carefully along the dotted line of the pattern. Use a cutter for greater precision.


Step 3
Now you need to fold all the solid lines of the template. Flip the paper over, so that the printed face is facing downwards. Use a thin ruler as a guide for perfectly straight folds.

Once the line is scored, remove the ruler and crease well.
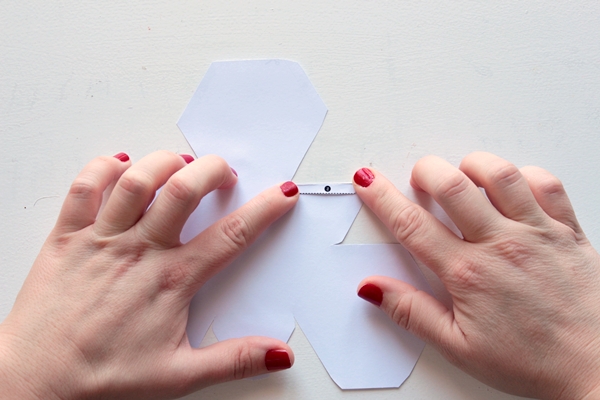
First, fold all the numbered tabs upwards.

Fold all the pentagons inwards.

Last, fold the three small triangles and crease well.

Step 4
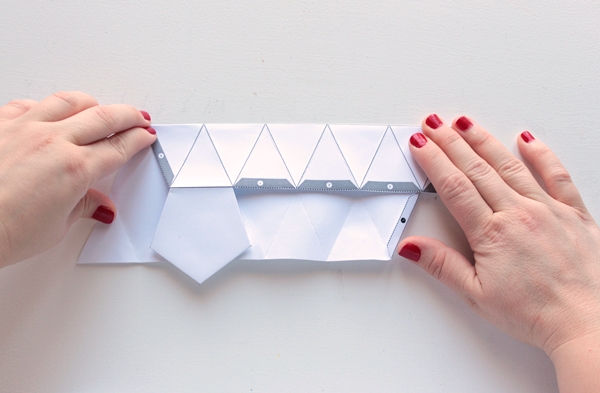
Unfold the paper.
Add some craft glue on tab number one.
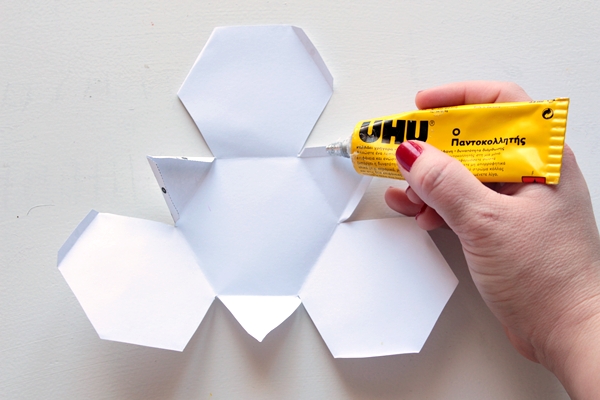
Glue each numbered flap on the grey area with the same number.

Keep the flap in place with your fingers until it’s firmly glued.

Keep on gluing the rest of the tabs in the same way, in the numbered order, until your shape is complete.

How To Make the Cuboctahedron
Step 1
Print it out like you did for the first shape.
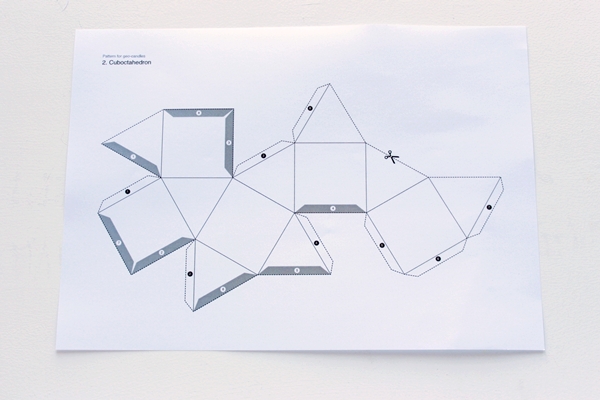
Step 2
Carefully cut out the shape, following the dotted line on the pattern.


Step 3
Flip the pattern over and fold inwards, creasing all the numbered tabs.

Fold inwards along the rest of the pattern’s solid lines. Crease them well and then unfold.
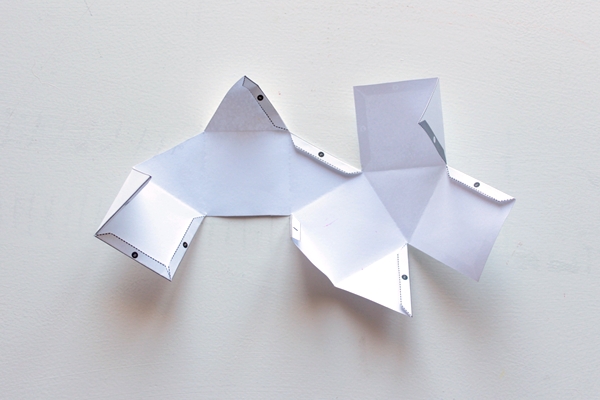
Step 4
Add glue along the numbered flaps or the corresponding grey area.

Follow the numbers in the pattern and glue the tabs together.

When you glue tab number eight, your Cuboctahedron (missing the top face) is ready!
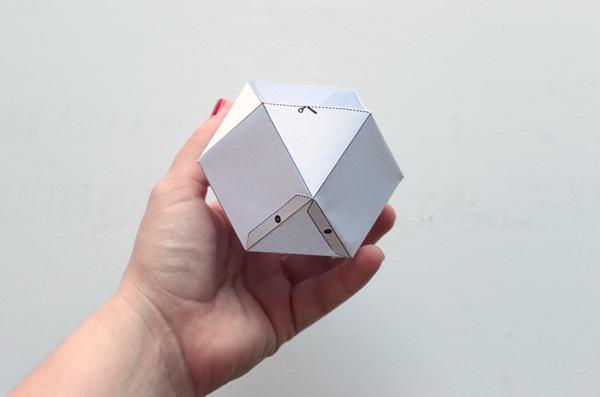
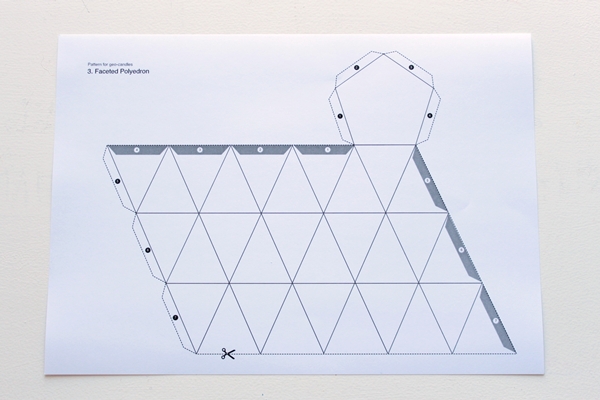
How To Make the Pentagonal Antiprism Tube
Step 1
The third pattern is not like the other shapes. It’s a tube. Don’t worry, making the mold is actually much easier than it sounds!
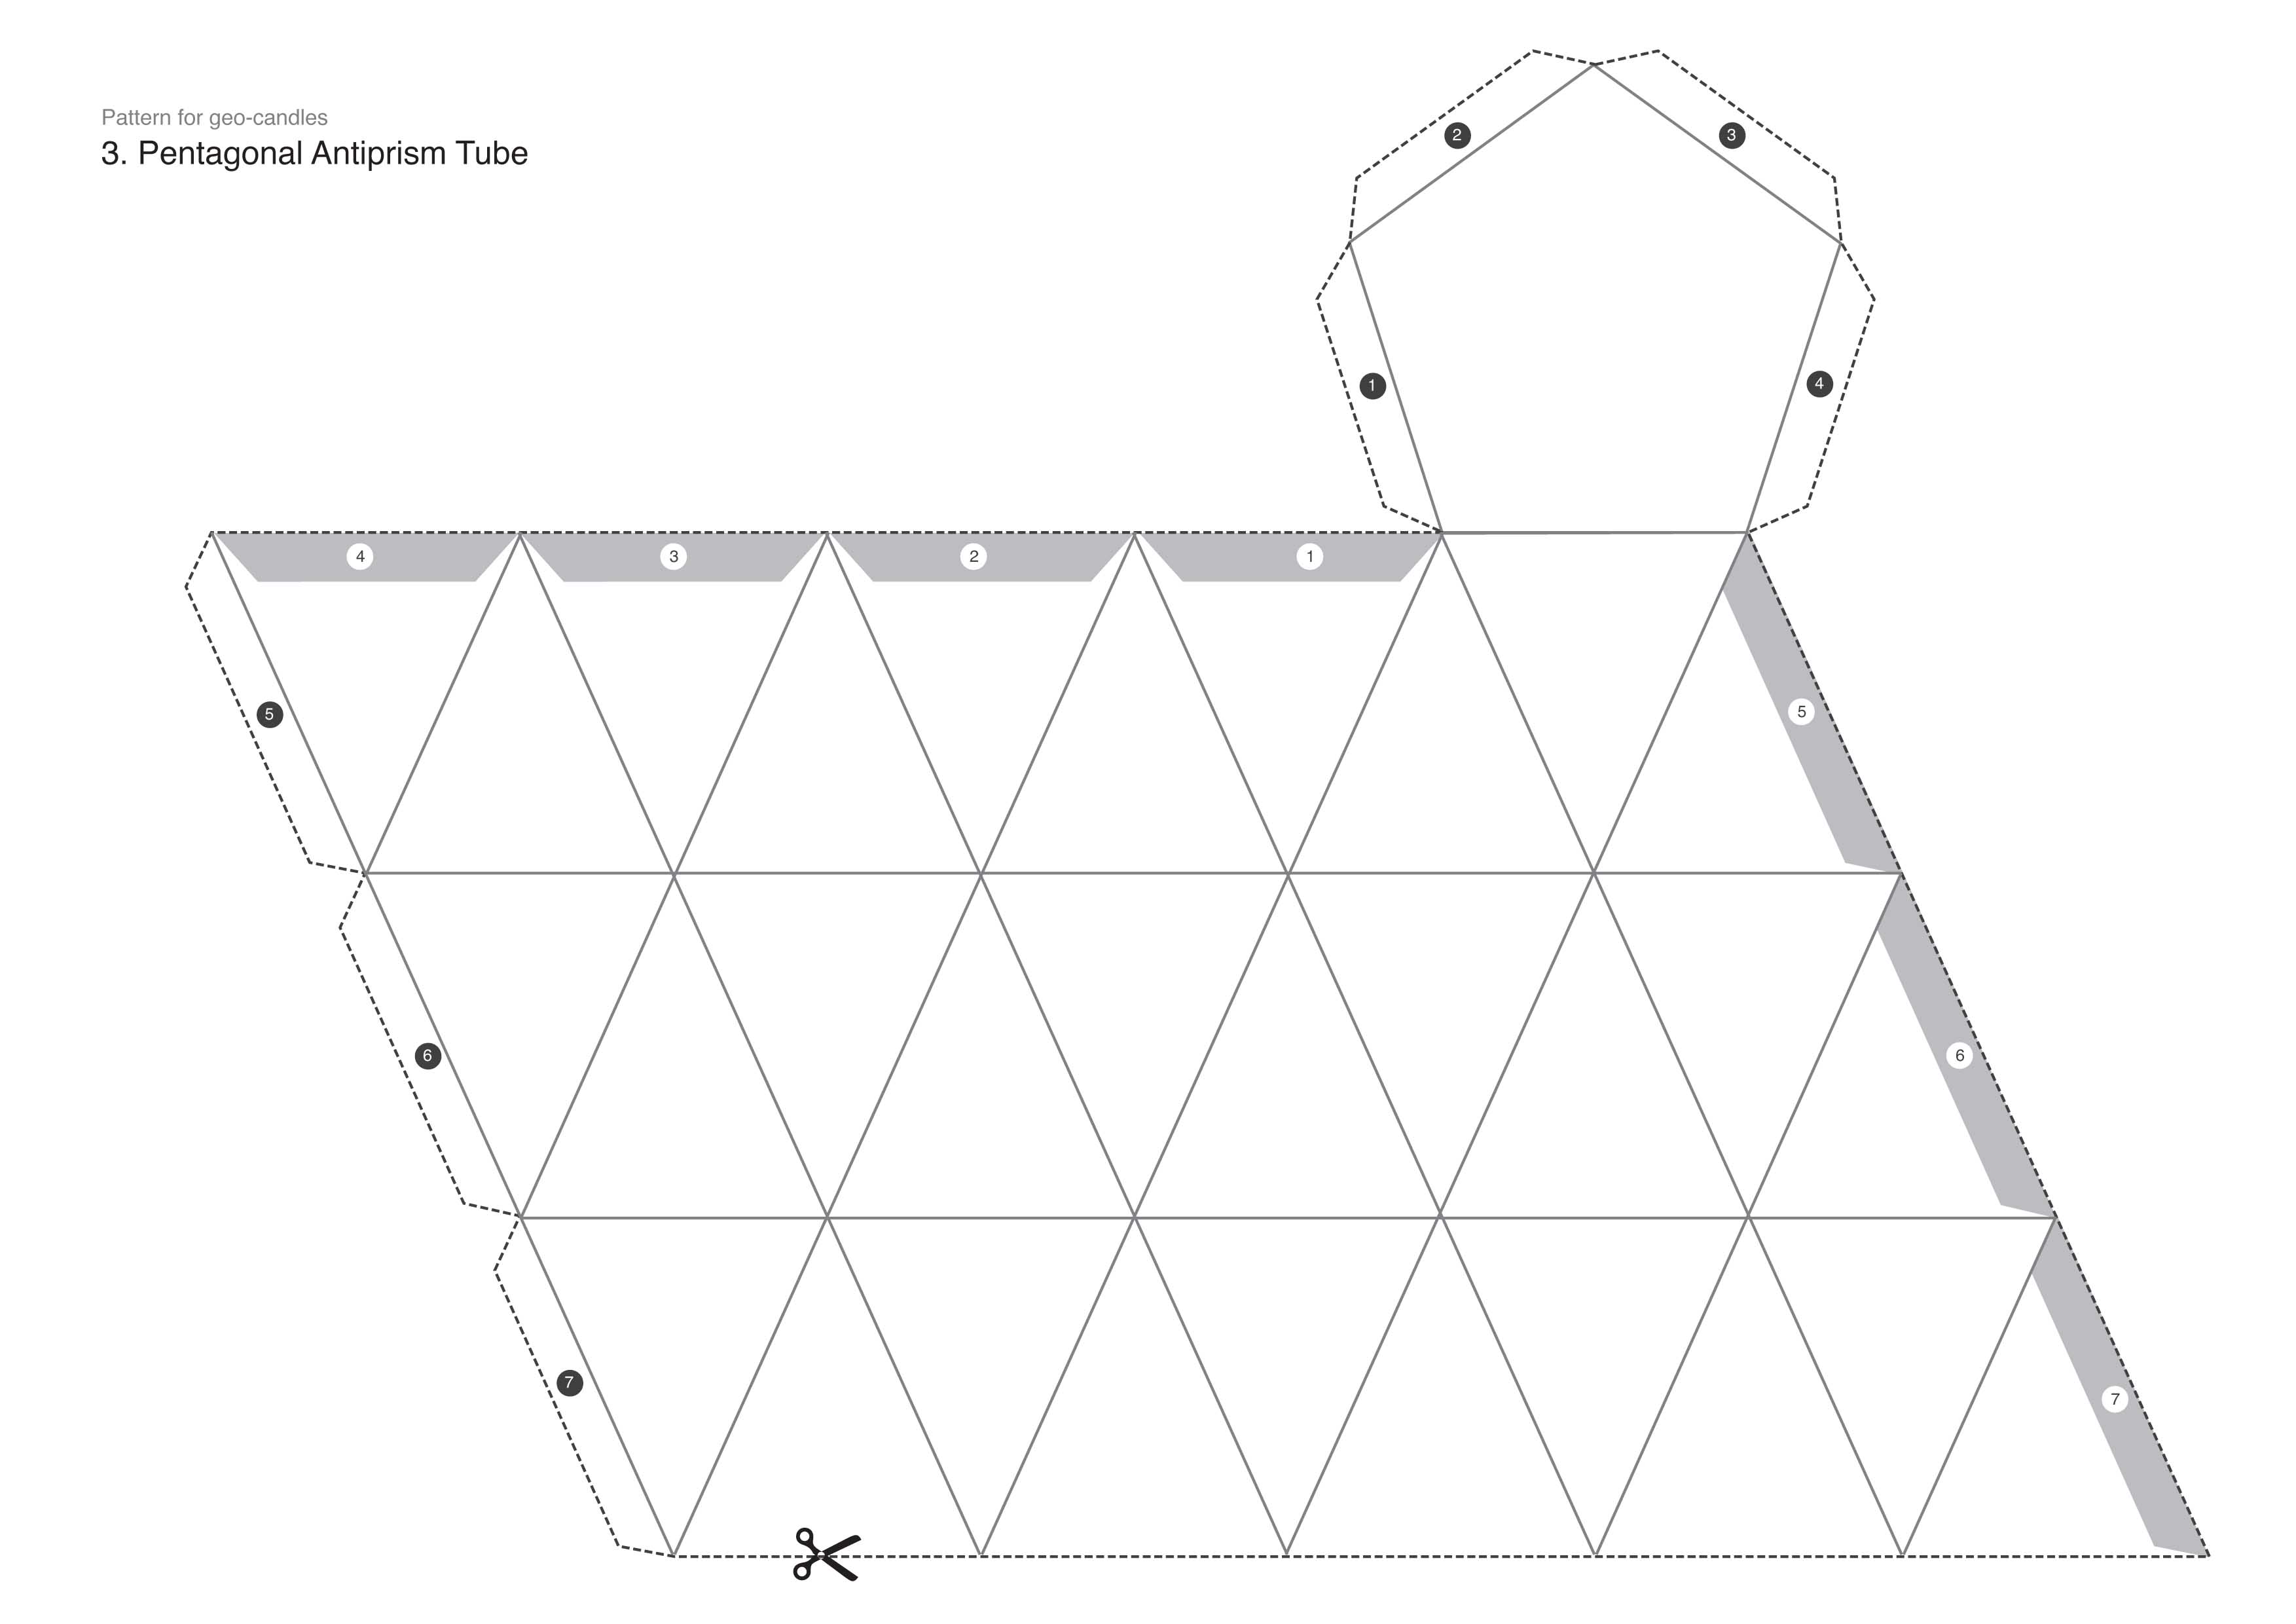
Print out the template.
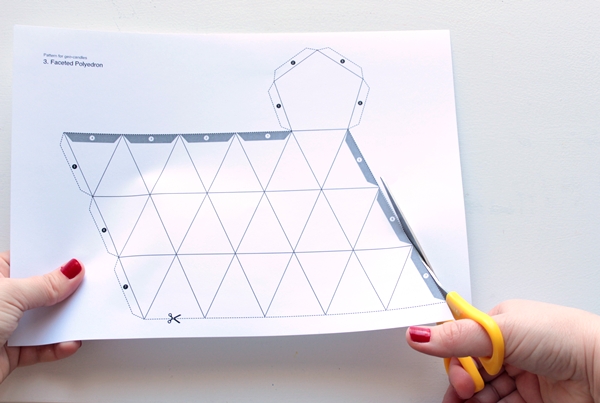
Step 2
Cut out the shape.

Step 3
Flip the paper over and use a ruler to help you make neat folds.

Fold upwards and crease all the numbered tabs on the right edge and around the pentagon base of the pattern.
Now, fold to the right along all the diagonal lines.

This time, fold the rest of the diagonal lines to the left.

Last, fold and crease along all horizontal lines of the design, starting with the pentagonal base.
Step 4
Now that all the creases are ready, roll the paper into a cylindrical shape. Glue the numbered tabs with the correspondent grey areas. Start by gluing the pentagonal base of the tube. Make sure you keep the flaps outside the shape.

Fold the tabs on the side as well. Allow to dry and your pentagonal antiprism tube is ready.

Now all three molds are just about ready to go!

Prepare for the Candle-Making Process
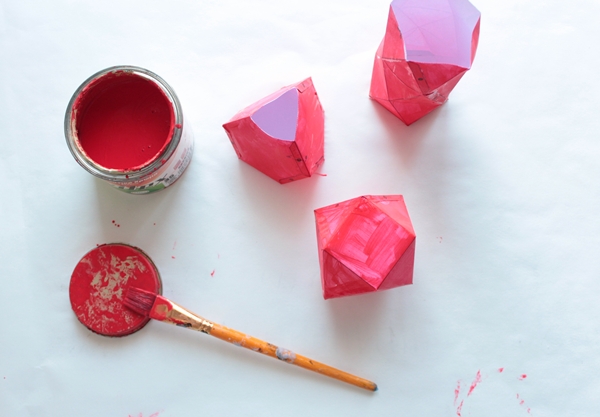
Step 1
Before you pour wax into the molds, apply a coat of house paint around the outside of the molds. Make sure all of the glue is dry.

Be generous with the paint at the corners of the tabs, which are the most vulnerable points of the mold. The paint will function as a protective layer, sealing it and preventing any leaking.
When the molds are painted, leave them to dry.
Step 2
It’s time to add the candle wicks. Use the short 13cm (5in) wicks for molds one and two, and the longer 18cm (7in) wick for mold number three.
Hold the wick inside the mold with the tab on the lower end.Measure the exact length from the bottom to the upper edge of the mold.
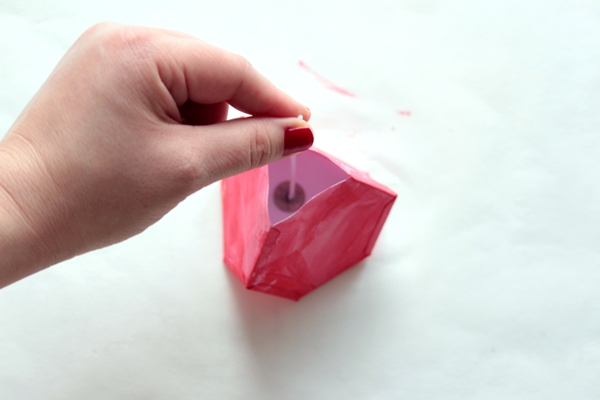
Now take a wooden skewer and wrap the wick around it to the required length.

Secure the wick in place with a knot.

Place the skewer on top of the mold and allow the wick to hang inside the mold. Make sure the wick reaches the bottom of the mold and that it is straight.
Also, it needs to be exactly centered so that the candle will burn equally.

Step 3
If you have an old pot, you can use it for heating the wax. Otherwise, if you don’t want to sacrifice a pot for candle-making, you can create a wire structure inside a large pot, which can support an empty jam jar.
So first calculate the diameter of your jam jar and twist the wire to create a circle based on this measurement. Then secure two or four ends of the wire to your pot handles.

Place the jam jar in the wire circle you created, and fill the pot with water. This will heat the wax gently and gradually, preventing it from boiling.

5. Create the Candles
Step 1
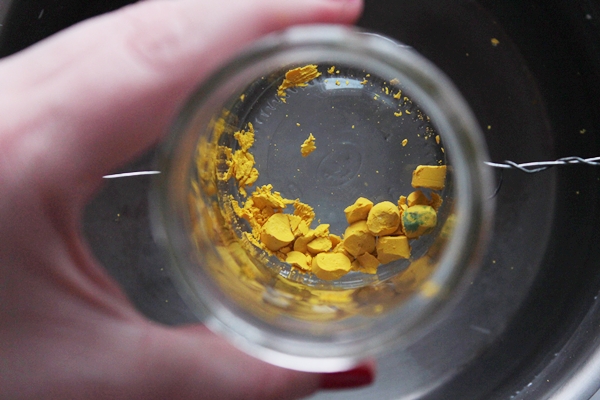
To add color to the candles, use some leftovers crayons. Make sure all paper is removed, then trim the crayons into small pieces and place them in the jam jar. It is best to start with lighter colors and gradually move towards darker ones.
Step 2
Place the pot on the stove on a low temperature. Once the pot starts to heat, the crayons will begin melting. Keep stirring it with a wooden stick (or skewer).

Step 3
Once the crayon has melted, carefully add the paraffin flakes to the jam jar. To be more precise, I used flakes that are 80 per cent paraffin and 20 per cent stearin. Calculate how much you need for your mold and add the equivalent quantity.
Keep on stirring until it blends. You can also add some spices or some scented oils if you want to make a scented candle.
In this step, keep the temperature low and be careful not to allow the wax to boil. You can also use a thermometer to check that the wax temperature never exceeds 120°C (250°F).

Step 4
Keep stirring and once the paraffin flakes have completely dissolved, remove the pot from the heat. Continue mixing the wax for a few seconds until it reaches 80°C (170-180°F).

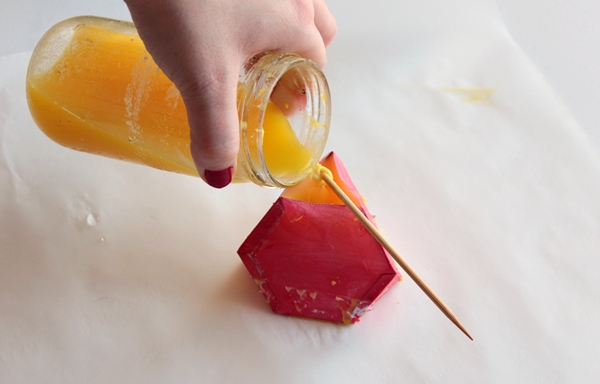
Place the mold in a pan with some baking paper in order to prevent any accidents. Carefully pour the wax into the mold. Make sure to keep the wick centered during this step.
For the taller candle (pattern number three), it’s best to pour the wax partially. This means you pour a small quantity and allow the wax to dry.
Then you heat the wax in the jam jar again before pouring a second layer. Continue this process until the mold is full. You need to pour the wax partially as the paper is not strong enough to sustain the volume of liquid all at once.
If you’ve prepared more wax than needed for this mold, don’t throw it away! You can easily heat it up again and use it for another mold.
Step 5
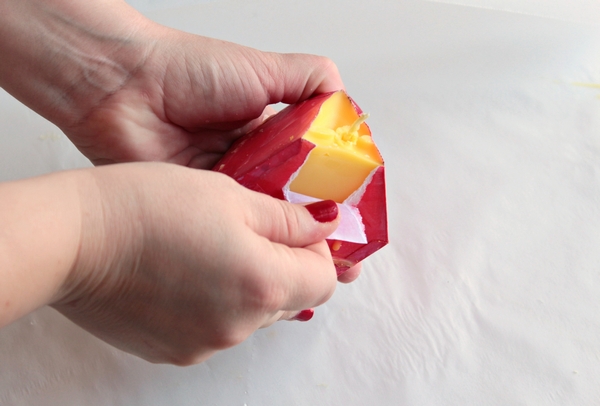
Leave the wax to cool for three to four hours, until it becomes solid. Remove the bamboo stick and trim the wick, leaving 2cm to 3cm (1in).

Step 6
Tear and remove the paper mold to reveal the candle.
________________________________________________________________
Whether you decide to burn yours or keep them as decorations, you’re going to love them, guaranteed. I love how mine look on top of my dresser!
What colors and scents are you going to do for yours?