Lately, I’ve been keeping track of different serving boards online because I’ve been trying to find the perfect one. I haven’t found the exact color and design I want, so I decided to make my own.
That’s when I stumbled on this tutorial by Jonny Builds on YouTube. Making my own could be easy, and he taught me how. Now my dinner parties have this stylish board as the centerpiece, and I know how to make more for gifts!
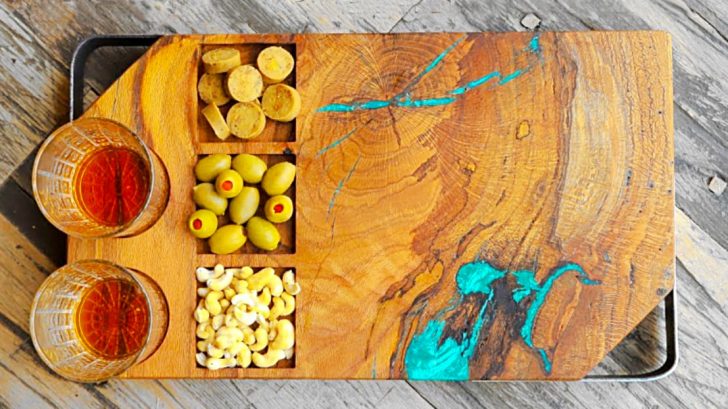
Want to make your own custom wood and epoxy serving board? Here’s how to do just that.
Step 1: Cut & Shape Your Wood

Begin by selecting a piece of reclaimed wood, then cut it to size, shaping it however you’d like it to look. You’ll want to do a preliminary sanding as well in order to get it smooth enough for the epoxy.
To select your wood, make sure it is a length and width that will allow you to make it into a serving board. There should also be openings in the wood piece so you can pour the epoxy into it.
Step 2: Mix & Pour Your Epoxy

Now for the fun part: mix together your epoxy, your hardener, and your pigment. Then, pour it into the voids in your wood. Be sure to follow Jonny Builds‘ tips and tricks.
It’s time to wait. Epoxy curing can take a while, so waiting over night is best for the next step.
Step 3: Let Cure, Then Sand

Let it cure completely. Follow the directions provided with your epoxy to make sure you’re allowing it to cure in the best conditions possible for the correct amount of time.
Once that’s done, you can trim and sand your wood to create the final board shape you want. Make sure splinters are completely sanded away.
Step 4: Add Hardware & Details

Now that the board is done, you can add any other details you see fit: handles, cup holders, divots for hor d’oeuvres, and more.
To learn more about different hardware options, watch Jonny’s video below.
Step 5: Finish With Oils & Waxes

Now that it’s all done, you can finish with oils or waxes to get the board in perfect shape. Jonny uses mineral oil (the food grade kind,) and beeswax to get his board shining.
Then wipe it down, and you’re done!
Be sure to check out the video below for more on how this is done. You can give this as a gift or keep it for yourself, but regardless, you’re going to get a ton of compliments!