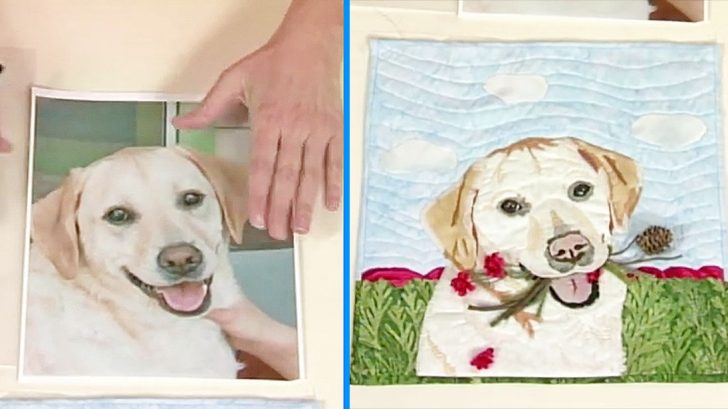
I’ve always wanted to turn some of my favorite photos into quilts but always wondered how to do it. It looked too hard to do, and frankly, I didn’t want to waste the fabric.
The secret is in tracing the photo in values to create a pattern, and it’s actually pretty easy. In art, value is how light or dark something is. So if you work on your pattern based on how light or dark parts of the photo are, it gets much easier.
Blogger Susan Carlson does fabulous quilts and she has incredible advice on tracing to get the result you want. First, if you can, use vellum instead of tracing paper, but if you can’t find that, tracing paper works. Use a sharp pencil to begin tracing.
Start outlining the larger shapes based not on parts of a face—nose, mouth, eyes—but in terms of value. Resist the urge to be extremely detailed. It will make it too difficult for you during the quilting process.
If it starts looking like a crazy paint-by-number drawing, then you probably have too much detail. Look for lightest areas and darkest areas to draw around. The middle values get filled in as the piecing process progresses.
When in doubt, go big. One rule of thumb: a face should generally be at least 10 to 12 inches top to bottom. Even bigger is better. Imagine trying to create an eye the size of your pinkie nail. Now imagine it the size of a golfball. Make it easy on yourself and go bigger.
Now you can use those values to create the quilt of your dreams. Click here for a tutorial on using that tracing to your advantage.