Easy & Unique

I’ve seen quite a few jelly roll strip sets over the years. They’ve been used in all sorts of ways, but I hadn’t seen anything like this before. Not only is it unique, it’s so easy to do.
The best part? It’s unique and it’s easy, yes, but it’s also a 100% free pattern! You can easily follow along with our written instructions or the video tutorial below, too.
This tutorial comes to us from Kimberly at the Fat Quarter Shop. This easy-to-follow video breaks it down step by step and makes the entire process a breeze.
So, you wanna make this quilt yourself? I don’t blame you. Let’s get started!
How It’s Done

First thing’s first: if you’d like it, click here to get ahold of the free pattern.
Now, we can move on to sewing the actual block, and it couldn’t be any easier. Seriously, I’m pretty sure I could do this with my eyes closed (but don’t quote me on that).
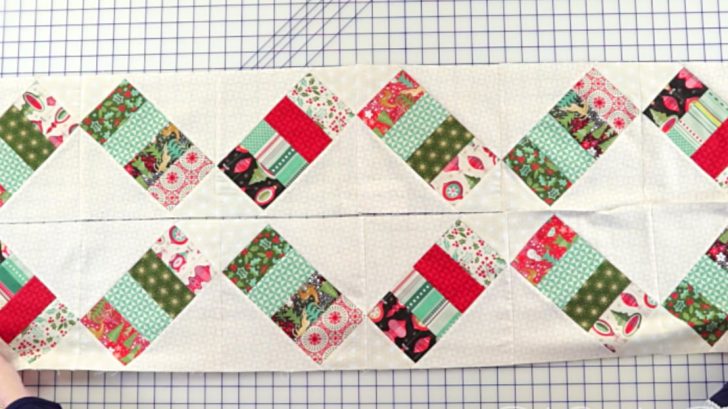
Start by sewing together jelly roll strips in sets of 4, side by side. You’ll make 6 of these total. You’ll also take your background fabric (both the large squares and small squares) and cut those along the diagonal.
You’ll make 96 of each of these. With your strip set, cut into subsets of 4.5″ x 8.5″ strips. You’ll make 48 of these. Now that your prep is done, it’s time to sew together your pieces.
Your strip subsets will be sewn together with one small triangle on either end, and one larger triangle on either side. Sew that all up and trim into a square, and your block is done!

Put those blocks together into your quilt top, add some batting, a backing fabric, and any borders and/or free motion designs you’d like, and you’re finished with your quilt.
Watch Fat Quarter Shop‘s video below for more tips and tricks, and happy quilting!