Fabric Eggs
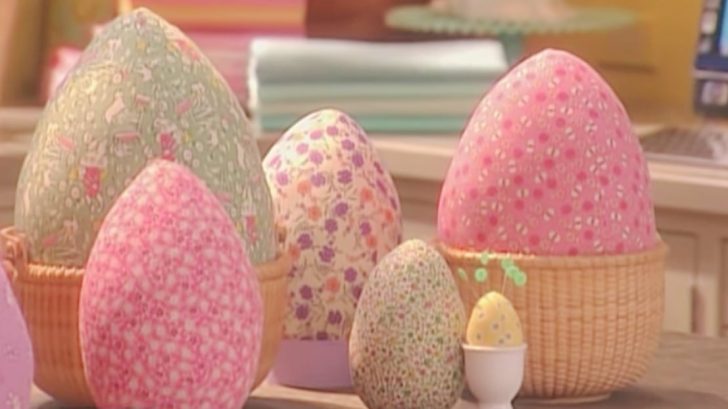
Easter is almost here. If you haven’t decorated your house yet, time is ticking away, so it’s time to decorate. The best way to decorate when you sew and quilt for a hobby is by sewing your decorations!
This little fabric egg is so easy to make, and it makes a great sewing project too. It kills two birds with one stone. What could be better than that?
To make it even easier, I found a video tutorial on how to make these little eggs, so without any further adieu, let’s get started!
Making The Eggs 
The big ones make great decorations or even toys for dogs and children. The little ones also can work for these uses, but I love mine as a pincushion.
Long story short, you can cover your house in the Easter spirit with these little guys. That, and they’re so easy to make! Martha Stewart and Hosanna Hauser show us how it’s done in their video tutorial.
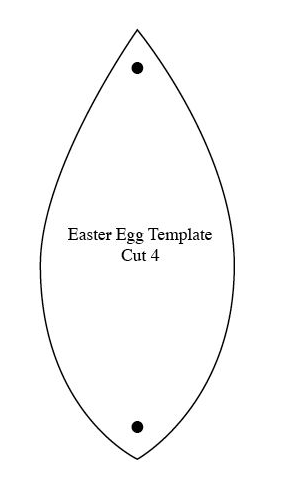
First thing’s first: to make these eggs, you’ll need a template. These fabric eggs are comprised of 4 of these, so you’ll definitely need them for cutting the fabric. Resize as necessary for different eggs.

Now, use these little templates to cut 4 pieces of fabric. If you’d like a solid egg, use one fabric. For something a bit more punchy, use two.
Then, you’ll need to sew them together. You’ll sew two at a time in order to create two rounded halves, as Hosanna and Martha show below.
Once that’s done, you need to stuff them up, sew them up, and you’re done! Watch Martha’s video below for more on how to do this!
Happy sewing!


