Chokers are my favorite accessory. I wear one almost every day, and some days I layer them. I’ve collected a ton over the years, but I had yet to make my own until recently.
I found this tutorial by THE MILK CLUB on YouTube, and I got to work right away. The supplies are pretty easy to get ahold of, and I love how the result turned out!
Advertisement
Want to make your own?
Here’s what you’ll need:

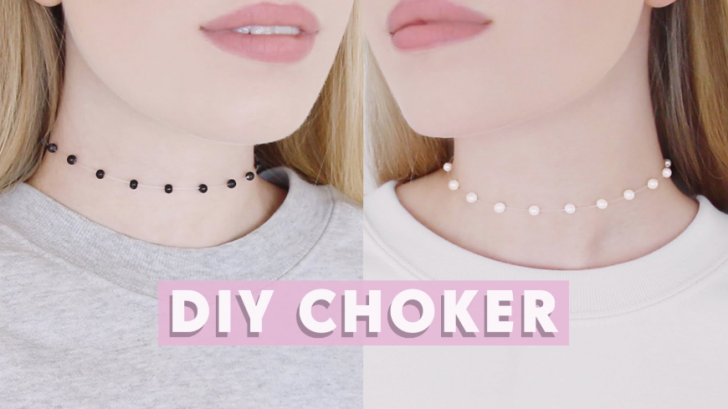
- Beads of your choice, she uses 4mm faux pearls in black and white
- 2mm tube crimp ends with clasps & extender chains
- Pins (optional, to apply glue with more control)
- Small needle nose pliers
- Ruler or measuring tape
- 5mm clear fishing line or craft thread
- Tape
- Hot glue gun (optional, makes some of the steps easier)
- Superglue
- Scissors
- Cut fishing line/craft thread to fit your neck. She uses about 35cm. Make sure to allow for mistakes with a little extra.
- Tape down one end of the clear thread to your work surface to make things easier
- Add your first bead to the string, lift the bead up a bit and add a dot of superglue. Tap it a few times to secure, then add another piece of tape after that bead, under the string.
- Use the ruler to space them evenly and repeat the steps. Hers are 13mm apart. Attach the clasp after removing excess choker. Don’t remove any beads. The hot glue gun can help with this.
- Secure both sides of the clasp with the needle nose pliers after the glue sets.
Now you have a super cute minimalist choker! I love how mine turned out and I can’t wait to make more with different designs. Watch the tutorial below to get started!
What kind of beads are you going to use for yours?