You’d never know by looking at this pillow that the pleats are fake, but believe it or not, they are. Because of the fake pleats, not only is this beautiful, but it’s incredibly easy to make.
Rather than use solid colors in the same shades, like she does in her tutorial, I used different prints. That also looks amazing, so you have a ton of possibilities!
What you’ll need is:
- 18″ x 20″ piece of fabric
- Jelly roll
- Ruler & pen
- Scissor & rotary cutter
- Thread & needle/sewing machine
- Pins
- Stuffing-and separate from each of the five colors 3 strips.
All of these materials make 3 pillows total.
Unroll your jelly roll. Take all of the strips except for one in the lightest color/pattern (whatever will be on the top of your pillow,) and put that strip aside for later use.
Take each strip minus that one and iron them in half. Now take those three strips of each color and make them 6 strips by folding in half length wise, and cutting at the crease. Do this to all your strips.
We will be using only 5 of the 6 strips so, put aside for another project 1 of the strips.
Take your one light colored strip you set aside in the beginning (that you didn’t press with an iron), fold in half length wise, and cut at the crease to make two strips.

Take one of your cut strips and fold in half width wise and sew with a 1/8″ seam allowance, sew your raw edges to create a long tube.

Take your seam and place it facing up towards you, and squish down your strip. Press with an iron.
This picture shows you the difference of the top strip vs the rest of the strips you pressed earlier.
Set aside your top strip for later use. Now take one of your 20 1/2″ by 20 1/2″ squares, and grab a ruler, and pencil. Make markings all along this square to guide you where to place our strips.
Start by measuring up from the bottom edge of the square 1 1/4″ and make your first mark by drawing a line. Now using your first mark made on the fabric measure up 3/4″ and make your second line.
Continue to do this for the whole pillow front, you will end up with 30 lines total, with the last one ending with 1/4″ seam allowance from the top edge.

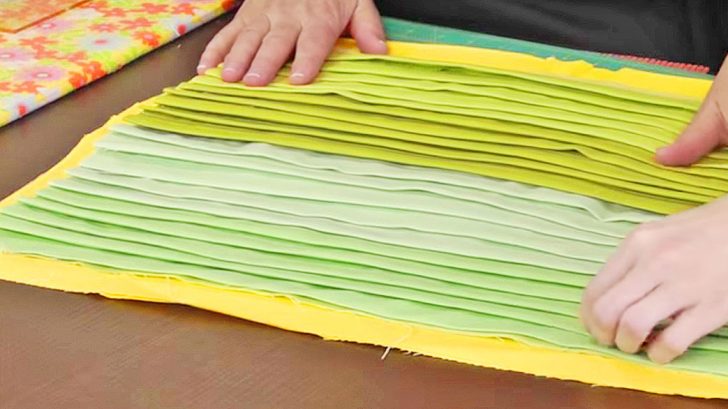
Now you are going to take your 5 darkest strips (black) and place the raw edge at your first drawn line.
Pin in place. Using a 1/8″ seam allowance, sew your first strip onto your pillow top square.
Now place your next strip on your next marking (the 3/4″ up) and pin it in place. Sew in place using your 1/8″ seam allowance. Keep going!
Continue to do this till you get all your strips put on EXCEPT for the top final strip.

Place your top strip on the final drawn line, and pin in place. Sew using a top stitch seam allowance. This will give it a good finished look.
Flip over your pillow top and with fabric scissors cut off the excess of your strips.
Grab your second 20 1/2″ x 20 1/2″ square and place it, right sides facing, on top of your pillow top
pin all around except for the bottom side of your pillow.
Take your bottom faux pleat and push it in slightly so it doesn’t get caught in your seam, pin in place your bottom edge.
Sew using a 1/4″ seam allowance around your whole pillow except leave an opening at the bottom edge at least 4″ wide for stuffing. Be sure to back stitch!
Turn it inside out, stuff, and hand stitch close.
Want some more detailed instructions?
Watch how Missouri Star Quilt Company makes this fake pleat technique in their step by step tutorial below so you can get started on making yours.
Also, check out Vanessa Christenson’s blog post to learn more!