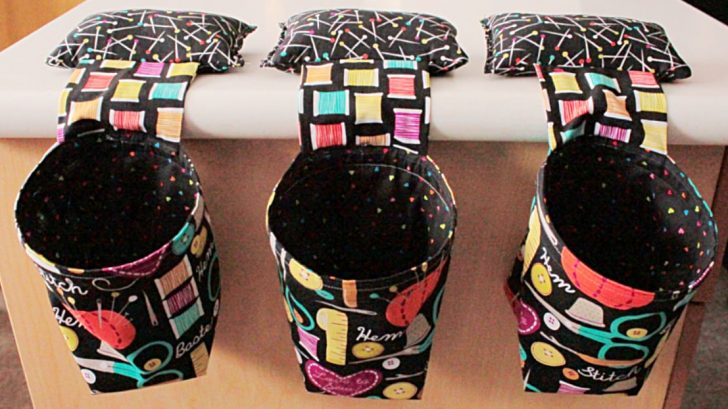
Everyone who sews absolutely needs two things: a pin cushion, and somewhere to keep their scraps as they go. This 2-in-1 scrap bag and pin cushion gives you both at once, and it’s super easy to make.
The pin cushion piece is 7″ x 8″, the hinge piece is 8″ x 4 1/2″, and you’ll need two 9″ x 16″ pieces for the bag and the lining.
Start with the hinge, folding it in half, horizontally, right sides together. Stitch around two sides, then turn it right side out. Flip it right side out, then press.
Take the hinge piece and place the 7″ raw edge on the center of your 7″x8″ piece. Then fold that piece over right sides together. Stitch one short side and one long side.
Flip right side out, then turn in the pocket 1/4″. Top stitch, leaving a little room for a funnel so you can stuff it later.
Take the longer side of your 9″ x 16″ outer piece and sew a decorative top stitch, folding a little bit under. Fold the bag horizontally in half, right sides together. Sew the two open edges.
Press the bag so the long stitch is running down the middle. This will create two points to create your bottom. Measure 6″ down, then draw a line across that. Sew across that line, stitching each “ear” separately.
Chop off the extra ear and leave 1/4″ seam allowance. Repeat the same process with the lining fabric. Sew the hinge in to the edge of the outside piece of fabric.
Place the lining bag inside the other bag, with the hing in between. Sew together from the inside using one stitch all the way around.
Finally, stuff your pin cushion. She uses walnut shells so there’s more weight to it, but you can use whatever you’d like.
That’s it, you’re done!
How do you store your scraps, and what pin cushion do you use?


